
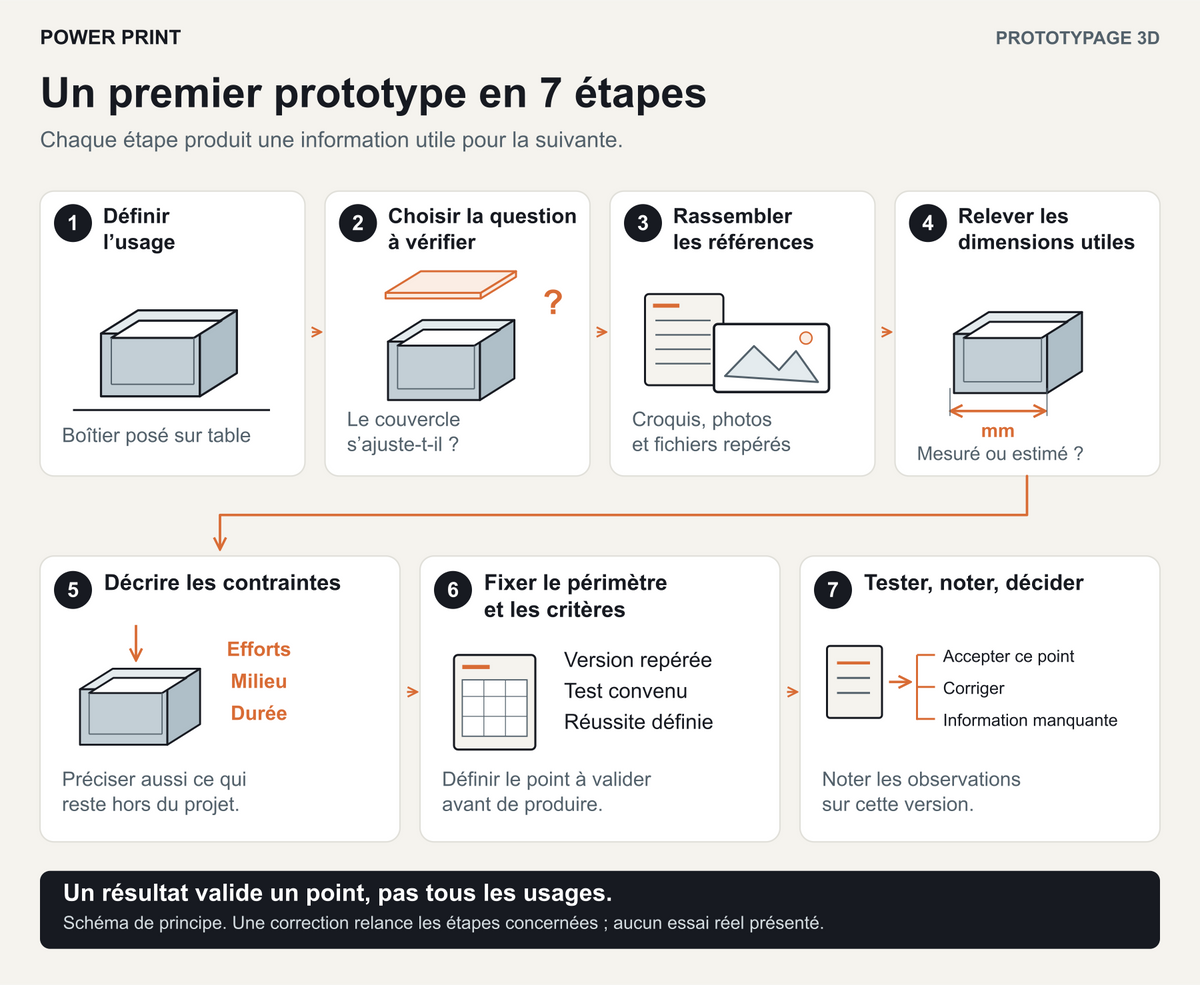
A sketch can be the starting point for a 3D prototype. To move forward, add what the object needs to do, the dimensions that matter and the question the first version must answer. You do not need a polished drawing to start the discussion; missing information, however, may prevent design work from beginning.
Let us take an educational example: a small storage box resting on a table, with a removable lid. It contains no electronics and has no safety function. This example represents neither a customer project nor a test carried out by POWER PRINT.

1. Define the use
Start with one sentence: “I want to enable this person to perform this action, in this context.” Then describe the action, what comes into contact with the object and how it will be stored or moved.
For our box, this might be: “Store small desk accessories and reach them by hand, with the box remaining on the table.” This sentence already makes clear that the lid is not a carrying handle.
Separate essentials from preferences: holding the accessories, for example, takes priority over a decorative shape. Also flag any excluded uses. If failure could injure someone, cause a load to fall or compromise electrical protection, say so from the outset: this process does not constitute safety validation.
2. Choose the question to answer
Avoid asking the first version to prove everything. Which uncertainty is preventing you from making a decision today? The available volume, access to the accessories or the way the lid fits?
For the box, you could begin by checking that the accessories fit inside and remain accessible. Another version could focus on the lid’s fit. The designer may also suggest making only part of the object if it is enough to examine the chosen point.
Our guide to choosing between a visual prototype and a functional prototype helps define this objective and avoid confusing a visual result with a verified function.
3. Gather the references
Prepare a legible sketch, with a top view and a side view if they provide different information. An arrow can show the direction of opening; a note can identify the area your fingers need to reach.
Attach what you already have: photographs of the intended location, objects to be stored, an existing drawing or a 3D file. On an inspiration image, explain exactly what interests you: the silhouette, opening mechanism or internal arrangement. It does not replace the project’s dimensions.
If you are starting from a broken object, the guide to preparing to reproduce a plastic part explains the useful views and measurements.
Give documents a date or number. Identify which reference should be used if several drawings contradict one another. “Storage-box-v1” is easier to follow than a succession of files called “final”.
4. Record the key dimensions
Measuring the outside of the object is not always enough. For our box, three groups of dimensions answer three different questions:
| What to measure | Why this information matters |
|---|---|
| Dimensions of the accessories and the space needed to grasp them | Define the usable internal volume, not just the overall external size |
| Space available on the table or in the intended storage area | Set the object’s external limits |
| Opening, supporting rim and depth available for the lid | Prepare the assembly and avoid areas that interfere with one another |
Record measurements in millimetres and mark the areas on the sketch. When positioning several features, measure from the same reference edge. Note the tool used and distinguish a measurement from an estimate.
Do not turn uncertainty into invented precision. If a dimension is missing, write that it still needs measuring. The clearance between two parts and acceptable dimensional variation must be defined with the designer according to the proposed assembly and manufacturing process; no single value suits every assembly.
5. Describe the constraints
Describe the use before choosing a material. In particular, explain:
- The environment: indoors or outdoors, exposure to sunlight, moisture, heat or cleaning products.
- The actions and loads: opening, pressing, bending or a possible impact; identify the areas concerned.
- The expected frequency: occasional or repeated handling, distinguishing a forecast from use already observed.
- The expected appearance: visible surfaces, a reference colour, or a texture or finish that matters to the decision.
For the educational box example, a check on a table would not, on its own, tell you how it would behave if left in a hot car. If that use becomes necessary, it changes the requirement to be examined.
If you know a temperature or load, give its value and where it came from. The materials and processes to consider depend on the project; their availability and suitability need confirmation.
6. Set the scope and criteria
Before modelling and then manufacture, clarify what the next stage should deliver. The quote should make the planned work clear: creating or adapting the model, a first sample, any finishing, checks and documentation supplied.
Ask which files will be provided and in what formats if you want to develop the design later. State the quantity you are considering and your preferred deadline. Any revisions, their cost and their timescale must be agreed before they begin; they are not automatically included.
Agree an observable criterion for each point to check. “The lid works well” is vague. “The lid reaches its closed position on the identified version, without tools or jamming, using the agreed action” gives a clearer basis for discussion. If a specific force matters, you also need to define how to measure it and what limit to use.
Before manufacture, have the version, important dimensions, useful level of finish and points that will remain outside the test confirmed.
7. Test, record, decide
When the prototype is available, return to the criteria agreed with the manufacturer. For a non-critical object, observations may cover volume, positioning the parts and the intended handling, without unusual loading.
Keep a short record: version tested, date, conditions, observed result, useful photograph or measurement, and decision. If the assembly jams or deformation appears, stop and document the area before modifying the object.
Distinguish three possible next steps:
- The point is verified under the planned conditions: the project can proceed on that basis.
- A discrepancy is observed: its cause needs examining before a change is defined.
- The test does not support a conclusion: information, a measurement or a more representative prototype is missing.
A lid that closes properly proves neither a service life nor suitability for every use. A new version must be identified, and the checks affected by the change must be reconsidered.
Present your project to POWER PRINT
The 3D prototyping and design service covers projects that still need their scope defined or their model created or adapted. You can start with the information you know and flag what remains to be determined.
The optional brief brings together your intended use, references, key dimensions, constraints, expected scope and initial testing questions. All these elements are also described in this article.
Download the brief for preparing a first prototype — printable PDF, 2 pages
Email the brief, photographs and files to contact@power-print.eu, including your name and project. If you also complete the quote request form, use the same details so that the two submissions can be matched.
Request a quote for my prototype project
For more on preparing questions and observations, the MIT prototyping exercises, in English, explain how to present what each model aims to check.
Share:
Visual or functional prototype: what do you actually need to test?
Visual or functional prototype: what do you actually need to test?